Author:
Source
Subhash Yadav
06 Sep, 2022
Studies show that 30%* of site visitors use the site search feature on a website (when made available) to get relevant results. More importantly, about 68%* of e-commerce site visitors would not return to a website that displays poor and oftentimes irrelevant search results.
Clearly, this underlines the importance of the search feature in a website. Algolia is a very robust, AI-powered search API that can help organizations build dynamic consumer-grade search features for their websites easily.
In this article, we will walk you through the process of integrating Algolia search into a Drupal 9 website.
This is the first chapter of a 2-Part series article. Stay tuned for the next chapter of this blog post to learn how to display the Algolia search results on your Drupal website.
But first, Why Algolia?
With Algolia, it is easy to build customized and powerful search solutions.
- It provides consumer-grade search
- Returns result faster than ElasticSearch/ Apache Solr
- Provides out-of-the-box support for results as you type, typo-tolerance, smart results highlighting
- Algolia is easy and fast to set up and is a paid service while ElasticSearch is an open service built on top of Lucene and has a steep learning curve
Configuring Algolia
Before moving on with setting up the Drupal – Algolia integration, note that this process assumes that you already have set up your Algolia account and know how to configure Drupal search API.
First, let’s configure the Algolia dashboard to create our index for storing and indexing the website data.
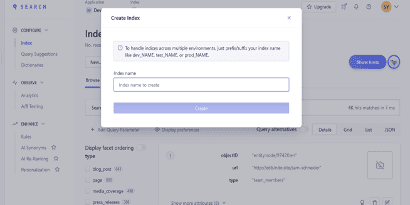
Once the index is created, we can also configure various search options like faceting, pagination and more by clicking on the Configuration button on the Index tab. You will learn how to configure facets once our data is indexed on Algolia. For now, let’s move to our Drupal 9 site to create a new Algolia server and index.
Configuring Search API
To index the website contents on Algolia, you’ll need the search_api_algolia module. It is an integration module that lets you connect to the Algolia service via Drupal’s Search API.
Download and enable the module. Once the module is enabled, you will need to create a server and index:
- Go to Configuration -> Search and metadata -> Search API
- Click Add Server and add Server Name
- Choose Algolia as the backend
- In the Configure Algolia backend, you will need the Application ID and the API key. For these, you can go back to the Algolia site and click on User Name on the top right side of the page and click on Settings again.
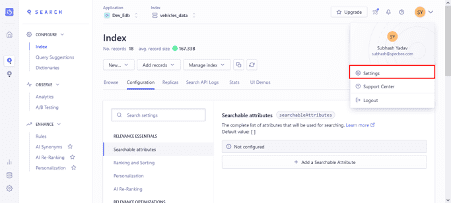
- Click on API Keys
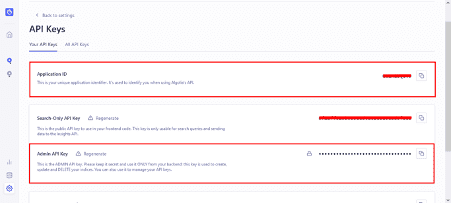
- Now, copy and paste the Application ID and Admin API Key from the dashboard.
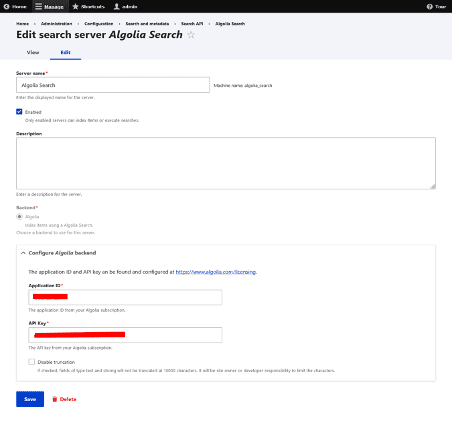
- Click Save.
Now let’s create an Index for our Search Server. For that Click on Add Index.
- Add Index Name and select the appropriate data sources that you want to index on Algolia.
- Under the Server option choose Algolia Search.
- Unde the Index options, enter the Algolia Index Name from the Algolia website.

- Click Save.
- In the fields tab, add required fields and Click Save.
- Go to the view tab and re-index all data.
Once the data is indexed, it is time to configure facets.
Configure Facets
Now let’s configure facets for filtering our search results by clicking on Facets in the Configuration tab.
Next, click on the Add an Attribute button available in the Attributes for faceting section as shown below.
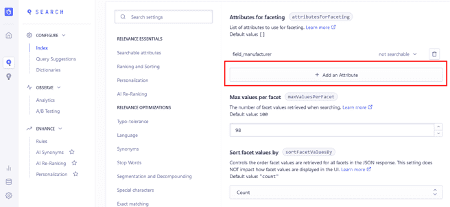
In the same way, you can also configure pagination options for your search functionality.
*Statistics References
- https://www.addsearch.com/blog/site-search-statistics/
- https://www.algolia.com/blog/ecommerce/e-commerce-search-and-kpis-statistics/
Final thoughts
In today’s section, you saw how we configured the Algolia dashboard to create an index and added configuration to our Algolia index. We also added a Search API server and configured an index in our Drupal site to index our site contents on Algolia Server. In the next chapter, you will learn how to display Algolia search results on your Drupal website using Algolia’s UI Library InstantSearch. So stay tuned! Don’t forget to subscribe to our newsletter to get the latest weekly articles in your inbox.


